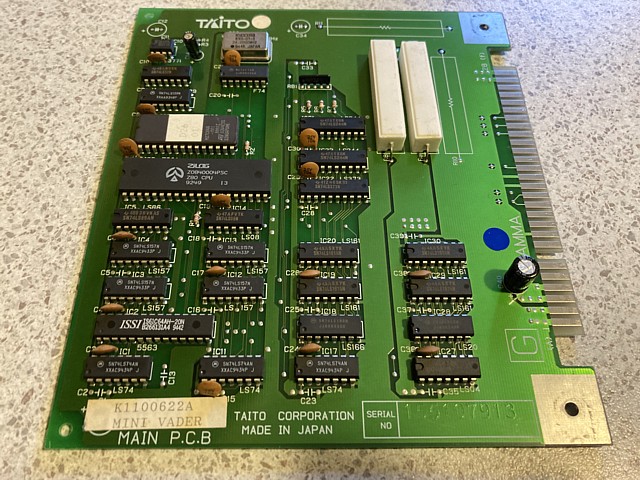
Mini Vaders 'test PCB' by Taito
Here's another JAMMA 'Test' PCB, this one is Mini Vaders by Taito which was apparently included with Taito's Egret arcade machines.
My interest in these little boards was piqued when I happened across a Dottori Kun PCB by Sega and read about the history of the various test PCBs, the reasons they were made and included with JAMMA cabinets of the '90s in Japan
For starters 'test PCB' is a misnomer as none of the boards seem to include any comprehensive test functions. All feature a very minimal game which can be played so 'mini game' might be a better description, similar to the mini games often found within arcade and console titles.
The whole idea behind the JAMMA standard was to produce machines with an interface which could accommodate any current or future game title which was made to the same standard, making the machines truly universal or 'generic' and not dedicated to a single game title as previous machines generally were.
But as the story goes, JAMMA machines made in Japan (commonly known as Candy Cabs) were not considered complete and could not be sold unless they included a working game of some sort. The response by the manufacturers was to produce a simple board which could be included with the machine at minimal cost and meet that requirement, a mere formality.
Reading between the lines it seems to me the manufacturers were a bit peeved about this rule and each used their enormous resources to produce a game which was so minimal that it barely met the letter of that law, as if to prove a point.
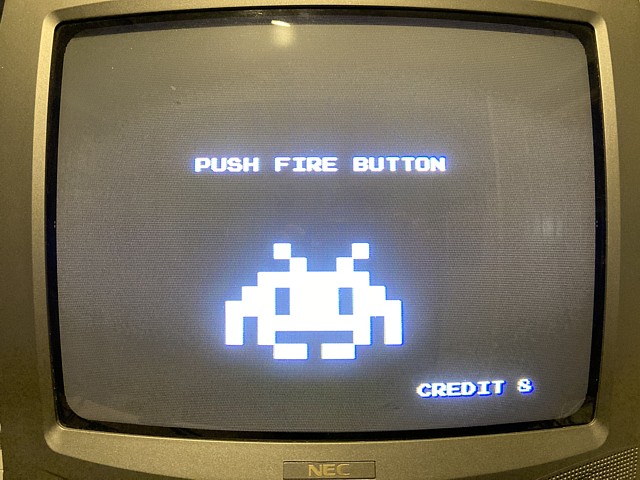
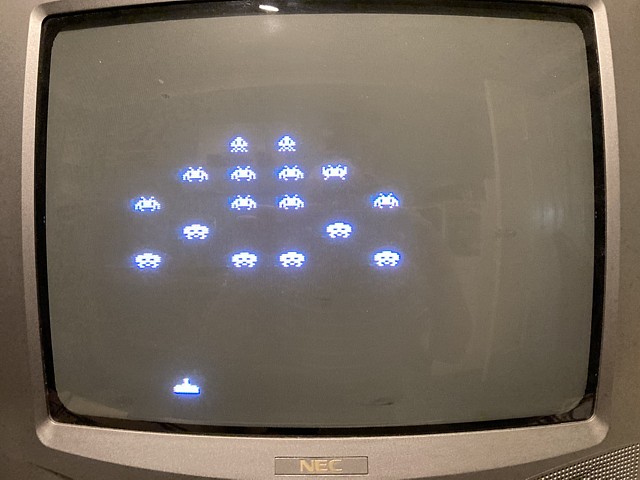
This is what intriques me about these 'test' PCBs and Mini Vaders is a great example. A Black and White game with no scoring or sound which features Taito's trademark Space Invader characters. In this game the invaders do not shoot back but advance side to side and downwards fairly quickly. If not all hit and any reach the bottom of screen the game is over.
Apparently there are eight levels each with different formations of invaders starting with a single invader on level 1. There is also an occasional UFO which can be hit, the word 'BOMB' appears but as there is no score this has no other effect. As usual with Space Invader games a missed shot is a costly mistake - as only one projectile can be on screen at a time it is impossible to shoot again until the previous shot hits something or leaves the screen.
There must have been quite a few of these PCBs made if one was included with every Taito Egret machine but it seems most were discarded as they had no commercial use for the operators of the day. They do appear to be quite scarce now and don't often come up for sale.
Having found one, the next question is what to do with it? More of a curiosity than a serious game, I'd still like to have it in a machine and playable so it will make a nice addition to my Taito Missile Command TT (cocktail) machine. Being quite small it fits neatly in a space behind the Missile Command PCB and can be connected up just by swapping the main game connector across, using an adaptor cable from the Missile Command pinout to a JAMMA standard socket.
I'd already made up an adaptor cable to test the Dottori Kun PCB in this machine but that game wasn't really playable here as the control panel for Missile Command has no joystick, just a trackball and three buttons.
For Mini Vaders, only three control signals are required along with the coin input so I can change the adaptor cable wiring slightly to connect the three control panel buttons to the Left, Right and Fire inputs making the game fully playable without any need to modify the original machine wiring or the Mini Vaders PCB.
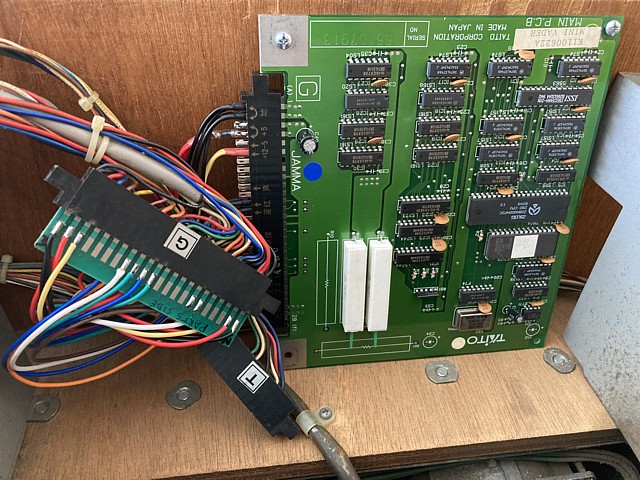
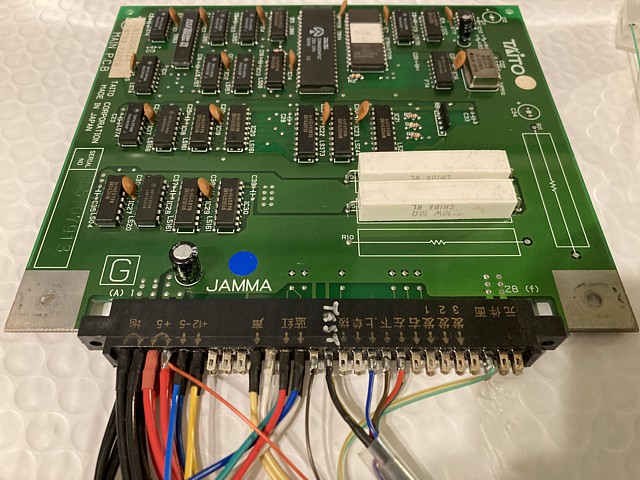
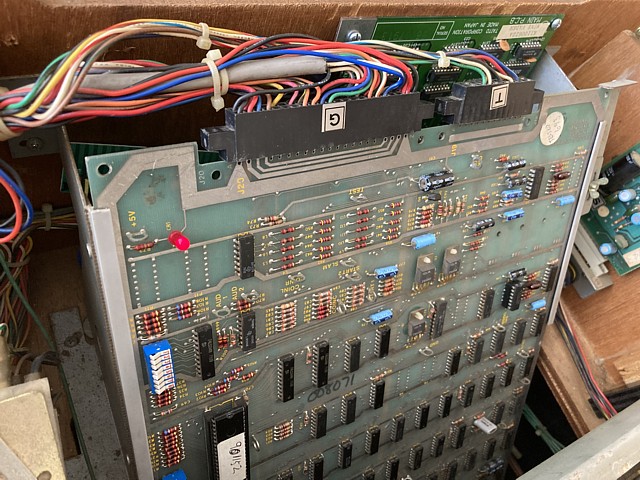
Something I noticed soon after first powering this little PCB up on the test bench, Taito obviously did not expect these boards to be run for any length of time as there are two 10 Ohm, 10 Watt resistors in parallel, connected across the +5V rail to provide a significant load for the arcade machine's power supply unit. These would be dissipating 5 Watts of power in total and heat up very quickly, if left on they would soon darken or even scorch the PCB.
In the interests of preserving the board in the best condition possible I decided to disconnect these by desoldering and lifting the resistor legs from the PCB tracks at one end then adding some heatshrink tubing to the 'loose' legs. They could always be reconnected to return the board to original configuration. That solves the heat problem but without the extra load of those resistors the PCB hardly draws any current from the machine's power supply, compared to the Missile Command PCB which is usually connected and the Voltages correctly set for.
Unplugging the 'G' connector temporarily and measuring the +5V supply with no load it reads over 5.6 Volts which is way outside the 4.75V to 5.25V range for TTL ICs. To alleviate the need to readjust the power supply every time the boards are swapped I'm adding a diode to the adaptor cable, in series with the +5V supply. The resulting 0.6V or so Voltage drop across the diode should be sufficient to reduce the +5V supply within the safe Voltage range.
Connecting the Mini Vaders PCB up now and measuring the supply it reads +4.85 Volts, well inside the correct range. Testing the controls, the game plays well - without colour, sound or scoring but a fun little 'mini game' all the same. It's definitely an interesting side note in the Taito story and well worth keeping, after all.
Web Resources (External Links) -
Arcade Test PCBs (English version) - BEEP! Game Center
Curiosities Vol. 2 - Mini Vaders and Dottori Kun - Lunatic Obscurity
All images and text on this website are Copyright.
Contact: jbtech at telstra dot com